Contents
Many maker spaces around the world are trying to add electronics and coding to their maker education programs. One of the best ways to do it is to integrate the Arduino boards into maker space projects. So this article describes all you need to know about Arduino, it’s types, uses, etc…..
What is Arduino?
Arduino is an open-source programmable circuit board that can be integrated into a wide range of electronic projects. Arduino contains hardware or microcontroller and software or IDE(Integrated Development Environment). The Microcontroller is programmed to sense and control the objects in the physical world. The IDE will be helpful in writing and uploading the computer code to the board.
Arduino has become quite popular among people for its benefits. All that we need to do is to connect the USB cable. Also, the piece of software in Arduino(IDE) uses a simplified version of C++ and makes it easier to learn the program. It’s flexibility and low cost also made it a very popular choice for the makers to create interactive hardware projects.
Here are some Aurdino- based projects which can help you out in doing projects:
- Instructables
- Arduino playground
- The ITP Physical computing wiki
- LadyAda
What’s on the board?
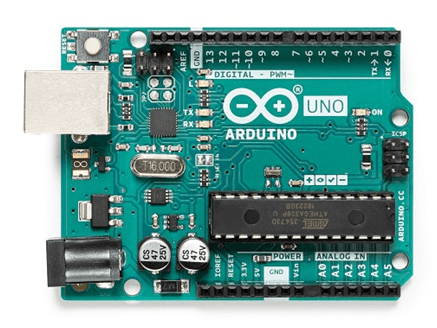
The Arduino board contains many components which are described as follows:
- 1) Power(USB/ Barrel Jack)
Every Arduino board needs to be connected to a power source. The Arduino UNO can be powered using a USB cable connected to your computer or any wall power supply which is terminated in a barrel jack. Do not use a power supply greater than 20volts which can overpower the Arduino and can even destroy. So to avoid this the recommended power supply is 6volts and 12volts.
- 2) Pins(5V, 3.3V, GND, Analog, Digital, PWM)
The pins are the places where you connect wires to construct a circuit. Pins usually have black plastic headers which allow us to plug the wire right into the Arduino board.
- GND: Shot for Ground. There are several GND pins on the Arduino boards among which one can be used to ground the circuit.
- 5V(4) AND 3.3V(5): 5V pin supplies 5volts of power and 3.3V pin supplies 3.3 volts of power. The Arduino board happily runs off of 5V or 3.3V.
- Analog: The area of pins under the label ‘Analog In’ is the Analog In pins. These analog pins can read signal from an analog sensor and can convert into the digital value which we can read.
- Digital: Across the analog pins we can find digital pins. These digital pins can be used for both digital input and digital output.
- PWM: These pins will normally act as digital pins but they can do something called Pulse-Width Modulation. These pins can also give analog output.
- 3) Reset button
The Arduino has a reset button. Pushing it will temporarily connect the reset pin and restart any code which is loading on the Arduino board.
- 4) Power LED Indicator
Just beneath and right to the word ‘UNO’ on your circuit board there will be a tiny LED which next to the word ‘ON’. The light should light up whenever you connect your Arduino board to a power source. If the LED is not turning up the light then it means that there is something wrong and the circuit should be rechecked.
- 5) TX RX’s LED’s
TX is short of transmitting and RX is short of receiving. These markings are quite important for serial communication. They appear at two places on the Arduino board that is one at digital 0 and 1 pins and another next to TX and RX LED. These LED’s gives us a visual indication whether the Arduino receives transmitting data or not.
- 6) Main IC
IC or Integrated circuit is a black thing with all the metal legs. It can be considered as the brain of the Arduino. It is important to know the IC type before loading up a new program.
- 7) Voltage regulator
It controls the amount of voltage which enters into the Arduino’s board. It will turn away the extra voltage which can harm the circuit.
Types of Arduino
Arduino has several different boards and each with different capabilities. So here are some types of Arduino boards which are as follows.
1) Arduino UNO(R3)
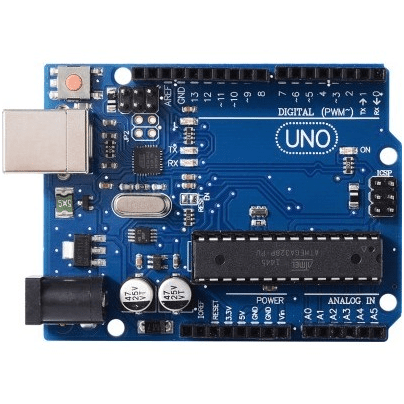
UNO will be the best choice for your first Arduino. It has 14 digital inputs and outputs, 6 analog inputs, a USB connection, a power jack, a reset button, and more. It has everything which is needed to support the microcontroller.
2) LilyPad Arduino
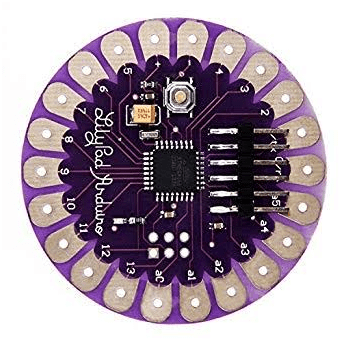
LilyPad Arduino is a wearable e-textile technology which is developed by Leah Bucheley. It was creatively designed with large connecting pads and has a flat back. and has input, output, power, sensor boards, etc… It is even washable.
3) Red Board
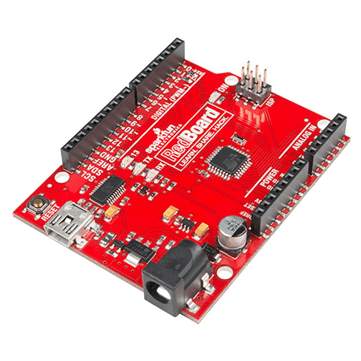
The Red board can be programmed by USB-B mini cable using Arduino IDE. It will work on windows 8 even without changing the security systems. It has a flat back which makes you easier to use in your projects. You can power the red board through USB or barrel jack.
4) Arduino Mega (R3)
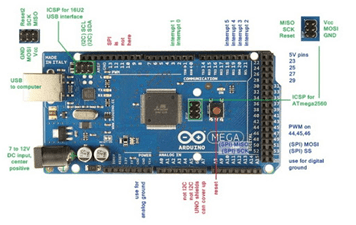
PIC CREDIT: alselectro
Arduino Mega can be considered as the big brother of UNO. It has 54 digital inputs/outputs pins, 16 analog inputs, a power jack, a USB connection, and a reset button. The presence of a large number of pins makes it handy to use in projects which require a huge number of input and output digital pins.
5) Arduino Leonardo
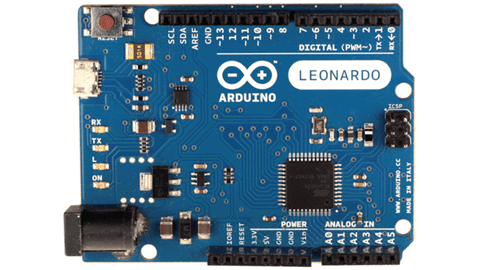
The Arduino Leonardo is Arduino’s first development board to use the microcontroller with built-in USB. Since the board is handling USB directly code libraries will be available which allows the board to emulate a keyboard, mouse, and many more.
The Extended Family of Arduino
Arduino alone cannot do the whole work. It needs the help of some components like sensors and Arduino shields
Sensors:
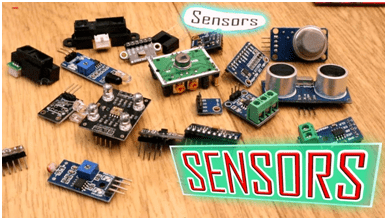
Arduino can control and interact with a wide variety of sensors by using some simple code. It can measure light, temperature, pressure, degree of flex, acceleration, radioactivity, humidity, barometric pressure, and many more.
Shields:
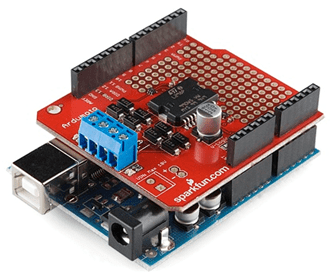
They are pre-built circuit boards that can be placed on the top of the Arduino to provide additional abilities like controlling motors, connecting to the internet, providing cellular or other wireless communication, controlling an LCD screen, and many more
Tools needed:

The most common tools required while working with Arduino projects are:
- Needle-nose pliers
- Wire strippers
- Precision screwdriver set
- Flush cutters
- Fine tip straight tweezers
- Digital multimeter
- Soldering iron
- Solder sucker
How To Program Arduino
Once the circuit has been created on the breadboard, you should upload the program to the Arduino. The sketch tells the Arduino board what functions it needs to be performed. An Arduino board can only perform and hold the one sketch at a time.
/*
  Blink
  Turns on an LED on for one second, then off for one second, repeatedly.

  Most Arduinos have an on-board LED you can control. On the UNO, MEGA and ZERO
  it is attached to digital pin 13, on MKR1000 on pin 6. LED_BUILTIN takes care
  of use the correct LED pin whatever is the board used.
  If you want to know what pin the on-board LED is connected to on your Arduino model, check
  the Technical Specs of your board  at https://www.arduino.cc/en/Main/Products

  This example code is in the public domain.

  modified 8 May 2014
  by Scott Fitzgerald

  modified 2 Sep 2016
  by Arturo Guadalupi
*/


// the setup function runs once when you press reset or power the board
void setup() {
  // initialize digital pin LED_BUILTIN as an output.
  pinMode(LED_BUILTIN, OUTPUT);
}

 // the loop function runs over and over again forever
  void loop() {
  digitalWrite(LED_BUILTIN, HIGH);
  // turn the LED on (HIGH is the voltage level)

  delay(1000);
 // wait for a second

  digitalWrite(LED_BUILTIN, LOW);
  // turn the LED off by making the voltage LOW

  delay(1000);
  // wait for a second
}
Every sketch has two main parts:
Void setup(): it sets the things up which have to be done once and doesn’t happen again.
Void loop(): it contains the instructions that get repeated over until the board is turned off.

My name is Vemula Chandana. I am from Hyderabad , and currently pursuing my BTech degree in Electronics and Communication Engineering in Anurag University.

Leave a Reply